2
DifficultyTesting Resistors in a Circuit
Posted by D. Rogers / in Energy & Electricity Experiments
Knowing how to measure the value of a resistor in a circuit is one of the beginner skills for understanding electronics. Most beginner electrical circuits classes starts with voltage, followed by learning about resistors. Resistors are the best way in a circuit to control the flow of current, therefore, they are used quite frequently. The following procedure will show beginners how to use a multimeter to easily test a resistor in a DC circuit.
Materials Needed
- Multimeter
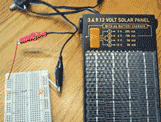
- DC circuit
- Optional
- Breadboard
- 9 volt battery with connector
- Resistor (any value)
- Jump wires
TESTING THE VALUE OF A RESISTOR
This resistor test is set up for a low-voltage direct current (DC) circuit. If the circuit is powered by regular batteries, then it is safe. If the circuit is plugged into the wall do not use this procedure unless you know how much current is active in the circuit and you know it is safe.
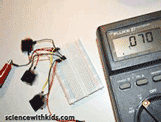
Step 1: Testing resistors is easy to do either with an individual resistor or with a resistor already in a circuit. First, set the multimeter to test resistance. The dial setting is typically the greek letter omega (see the photo). Omega is also the symbol for Ohms which is the standard unit for resistance.
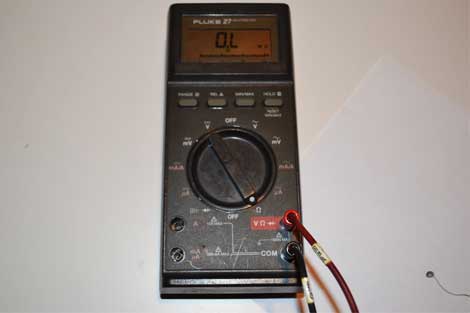
Set the multimeter to the Ohm test reading on the dial.
Step 2: Turn off the power supply to the circuit either by removing the battery or disconnecting the DC power source. Some multimeters are damaged when trying to test resistance when power is flowing through the circuit.
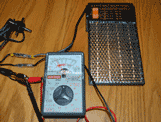
Step 3: Insert the black test probe into the negative (-) or COM port on the multimeter. Insert the red probes into the positive or V port on the multimeter. The multimeter is now set up to test the value of almost any type of resistor.
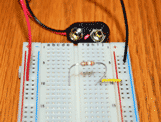
Step 4: Touch the negative probe to one leg of the resistor and the positive probe to the other leg of the resistor. The legs are the silver metal wires extending from the body of the resistor. Polarity (direction of current flow) does not matter for a standard resistor. It also does not matter if the resistor is in the circuit or a loose component. If the meter is set up to test resistance it will do the work of calculating a result in Ohms.
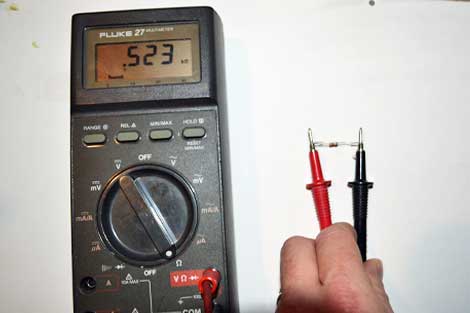
Touch the test probes on each leg of the resistor and look at the multimeters readout screen to view the value of the resistor. Some multimeters are not auto-ranging. The auto-range feature automatically sets the correct range which the resistor value will show a result. If the meter is not auto-ranging, make sure that the expected ohm range setting is selected before taking a reading or the reading may show up as zero or a very large number.
Step 5: You can compare the reading of the multimeter to the value of the resistor. The factory resistor value is determined by reading the color ring coding.
Step 6: The value of the resistor should be within 10 percent of the value indicated by the color coding. If the tested value of the resistor is near the value stated on the color-coding, then it confirms that you did the test correct. You now know how to test a resistor with a multimeter. Try to practice on a few more resistors to make sure you understand.
ADDITIONAL INFORMATION ABOUT TESTING A RESISTOR
There is much you can learn by testing individual components in a circuit. Testing resistors is one of the easiest tests to perform. Understanding how to test a resistor is a great way to help kids learn about electronic circuits and start to troubleshoot their own circuit designs.
Resources:
Resistor standard color coding
Make your own resistor with the "Electrical Resistor Experiment"
Please select the social network you want to share this page with:
We like you too :)
Thanks for taking time to give us feedback!

posted by D. Rogers