3
DifficultyHow to Make Electricity from LEDs
Make a Simple Circuit to Allow LEDs to Generate Electricity
Posted by Admin / in Energy & Electricity Experiments
LEDs offer a nice, inexpensive way to add light to an electronics project or for decorative light. Since an LED is a diode it should be possible to also generate electricity. This experiment will test to see if it is possible to generate electricity from multiple LEDs.
Materials Needed
- solderless breadboard
- 4-12 LEDs (colors or clear will work)
- Jumper Wires
- Multimeter or voltmeter
- Wires with alligator clips
Building and Testing the LED Generator Circuit Experiment
Step 1: To create our LED generating circuit a solderless breadboard is used to plug in the connection so we can avoid using a hot soldering iron. A breadboard has hundreds of holes where wires or electronic components are connected. Different holes on a breadboard are connected electronically. Connections between the holes are organized in rows and columns. The image below shows and example of how a typical breadboard is organized.
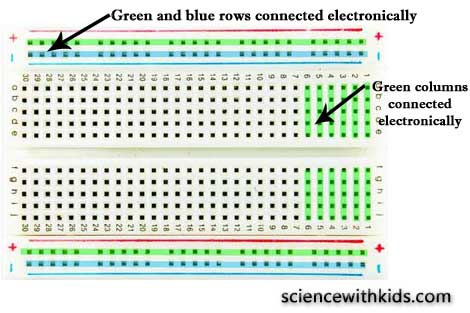
See our beginner electronics article, Beginner Electronic Experiments for Kids for more information about using a breadboard or getting started in electronics for kids..
Step 2: Locate the longer leg on a LED. This leg is also known as the anode and is considered the positive side of a Light Emitting Diode.
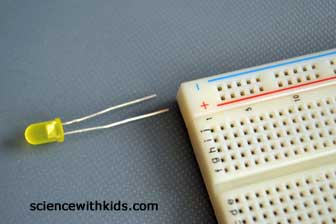
Step 3: Place the long leg of each of the LEDs in one of the holes in the positive power rails, highlighted as a red row in the photo below. Place the short leg of each LED into the adjacent hole which is the negative power rail. This column is highlighted in green in the photo below.
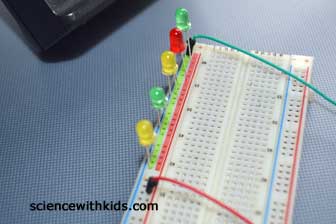
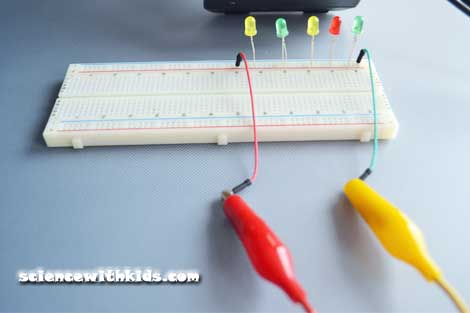
Step 4: Place one jumper wire in one of the holes in the positive power rail on the breadboard. Place the wire into a hole outside of the last LED. We used a red jumper wire to match the red multimeter probe wire, we will discuss in a few steps.
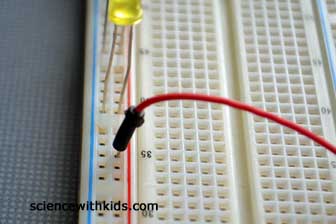
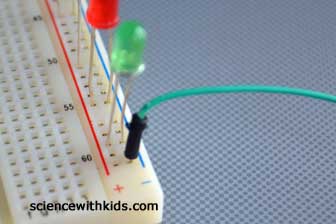
Step 5: Place a second jumper wire in one of the holes in the negative power rail. Place the one end of the wire in a hole outside of the last LED, the opposite direction. In our example, we used a green jumper wire for this step as shown in the photo.
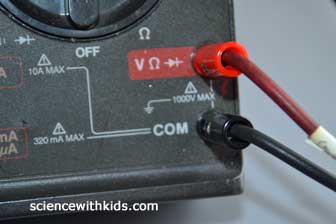
Step 6: Set up the multimeter to test voltage. Insert the red probe into the correct voltage port and the black meter probe into the COM port. If you need more information on testing DC voltage, go to our article How to Test DC Voltage.
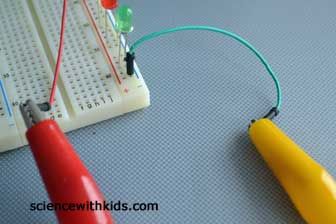
Step 7: Using the alligator clip wires connect the red probe to the red power rail jumper wire. Connect the COM (black) probe wire to the negative rail jumper wire.
Step 8: Turn on the multimeter and set the dial to read DC voltage. It is the V symbol. Read the voltage value produced by normal room light. Now move the breadboard over to a window or take it outside and watch the voltage values increase!.
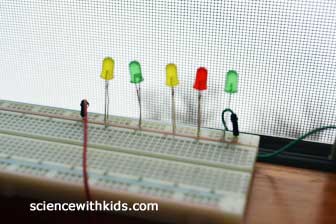
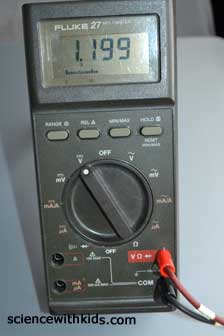
For our test on a cloudy winter day with only 5 LEDs, we were able to generate about 1.2 volts. Not bad..
What We Learned about the LED Generate Electricity Experiment
LEDs are Light Emitting Diodes, which as the name describes, can light up. A diode is like a one-way valve for electronics. When electricity excites the electrons in a LED, it will light up. The reverse is also true. When light enters the LED, it will excite the electrons and generate a small amount of electricity. In our example, we used multiple LEDs to make more electricity. The experiment uses a parallel circuit so the light generated by each of the LEDs can be combined for a higher output. Try covering one or more of the LEDs while the multimeter is still reading voltage and you will see the readings drop.
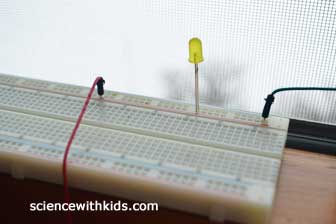
Alternatively, you can remove all but one LED and see the results. Our voltage reading with one LED was only 0.3 volts. Keep in mind this was on a cloudy winter day through the glass of a window. Also, if you have more LEDs add them. It is very important, however, to keep the overall voltage at 3 volts or less. Over this amount will cause damage to the LEDs. If you want to generate more current from the LED's you could add resistors to keep the voltage lower.
Resources:
-
6
DifficultyHow to Make a Simple Battery
in Energy and Electricity Experiments
Make a simple battery using coins and other common items.
-
3
DifficultySolar Energy Experiment for Kids
in Energy and Electricity Experiments
Teach kids how light is used to generate electricity in this solar energy experiment.
-
2
DifficultyBeginner Electronics Experiment For Kids
in Energy and Electricity Experiments
This experiment is a good starting point for kids to begin learning about electronics.
-
5
DifficultyLED Solar Circuit Experiment
in Energy and Electricity Experiments
Learn how to make an electrical circuit to power an LED using solar power.
-
4
DifficultyHow to Make an Electromagnet
in Energy and Electricity Experiments
Test the relationship between electricity and magnetism by making an electromagnet.
-
3
DifficultyPower a Light with Static Electricity
in Energy and Electricity Experiments
Use static electricity to power a light bulb!
